How to Set up a Membership
- 1 Minute to read
- DarkLight
- PDF
How to Set up a Membership
- 1 Minute to read
- DarkLight
- PDF
Article summary
Did you find this summary helpful?
Thank you for your feedback
Before you sell a membership, you have to first set up a membership in the Inventory screen.
Step-by-step guide
- Go to Operations > Inventory > Inventory.

- Click Add at the top of the screen to add a new inventory item.

- In the Add Inventory screen, select Miscellaneous from the Type of Product drop down.

Name the membership in the Description field, for example, VIP Membership. Then choose an existing Department or add a new Department.

Click Save and return to the Inventory Maintenance screen. You will find the newly added item listed on the screen.
Under the Other Info section, check the Membership option, and then click on the Membership Setup button.


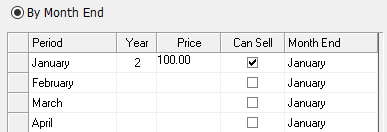
- In the Membership field, enter the title of the membership you are creating. (e.g. VIP, or 6 Month, 1Year etc.). Then select the month that the membership will start, the month it will end, and the number of years the membership will last.

Set the applicable price for each row, then check off the months under the Can Sell column when the membership can be sold.
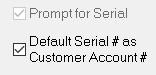
Check off the Default Serial # as the Customer Account #, or set the system to Prompt for Serial for a new one.
When finished, click the Accept button to save the membership settings and quit the membership screen. You will return to the Inventory screen.


- Click on Save, then click on Quit to leave the Inventory Screen to complete this membership setup.

Was this article helpful?